Example on turtlebot 3 burger
First, install the necessary dependencies
sudo apt install ros-noetic-joy ros-noetic-teleop-twist-joy \
  ros-noetic-teleop-twist-keyboard ros-noetic-laser-proc \
  ros-noetic-rgbd-launch ros-noetic-rosserial-arduino \
  ros-noetic-rosserial-python ros-noetic-rosserial-client \
  ros-noetic-rosserial-msgs ros-noetic-amcl ros-noetic-map-server \
  ros-noetic-move-base ros-noetic-urdf ros-noetic-xacro \
  ros-noetic-compressed-image-transport ros-noetic-rqt* ros-noetic-rviz \
  ros-noetic-gmapping ros-noetic-navigation ros-noetic-interactive-markers ros-noetic-tf2-tools

sudo apt install ros-noetic-dynamixel-sdk
sudo apt install ros-noetic-turtlebot3-msgs
sudo apt install ros-noetic-turtlebot3
With a simulated tb3
For a simulation robot install the turtlebot simulation package
cd $HOME/catkin_ws/src
git clone -b noetic-devel https://github.com/ROBOTIS-GIT/turtlebot3_simulations.git
cd ..
catkin_maker
source devel/setup.bash
Then launch gazebo in a first terminal
roslaunch turtlebot3_gazebo turtlebot3_house.launch
You can now launch ronoco in another terminal
roslaunch ronoco rolling.launch
At this point you can choose to :
- map the environment
- navigate on an existing map
To map the environment, simply issue the command
roslaunch turtlebot3_slam turtlebot3_slam.launch
This will open rviz and the robot will start to build the environment around it. You can move it around using ronoco's directional arrows.
Once you are happy with the map, don't close the previous terminal and run the command
rosrun map_server map_saver -f ~/map
Once this program is finished you can shut down the two previous terminals and move on to navigation.
To perform the navigation run the following command
roslaunch turtlebot3_navigation turtlebot3_navigation.launch
Once rviz is open you can create behaviour trees using ronoco
With a real tb3 (ros4pro)
To control a real turtlebot 3 with the ros4pro package (refer to https://learn.e.ros4.pro/fr/navigation/turtlebot/ for more information)
First, install the ros4pro package
cd $HOME/catkin_ws/src
git clone https://github.com/ros4pro/turtlebot3_ros4pro.git
cd $HOME/catkin_ws && catkin_make
source devel/setup.bash
You can now start ronoco with the command
roslaunch ronoco rolling.launch namespace:=/tb3
In a first terminal connect to the robot via ssh and then run the command roslaunch turtlebot3_ros4pro bringup.launch.
For mapping
Run the command roslaunch turtlebot3_ros4pro slam.launch. RViz will launch and you should see the robot, the LIDAR scans and the map under construction. You can move the robot using the directional arrows of ronoco
In a new terminal run the command roscd turtlebot3_ros4pro/maps/ to go to the folder where the map is saved.
The following command will delete the previous map if there is one, or make a copy if you want to keep it. Run the command roslaunch turtlebot3_ros4pro map_saver.launch which will save the map in the maps folder of the turtlebot3_ros4pro package (maps.yaml and maps.pgm files).
For navigation run the roslaunch command turtlebot3_ros4pro navigation.launch to start location and autonomous navigation. Once rviz is open you can create behaviour trees using ronoco
For example the execution of the tree below
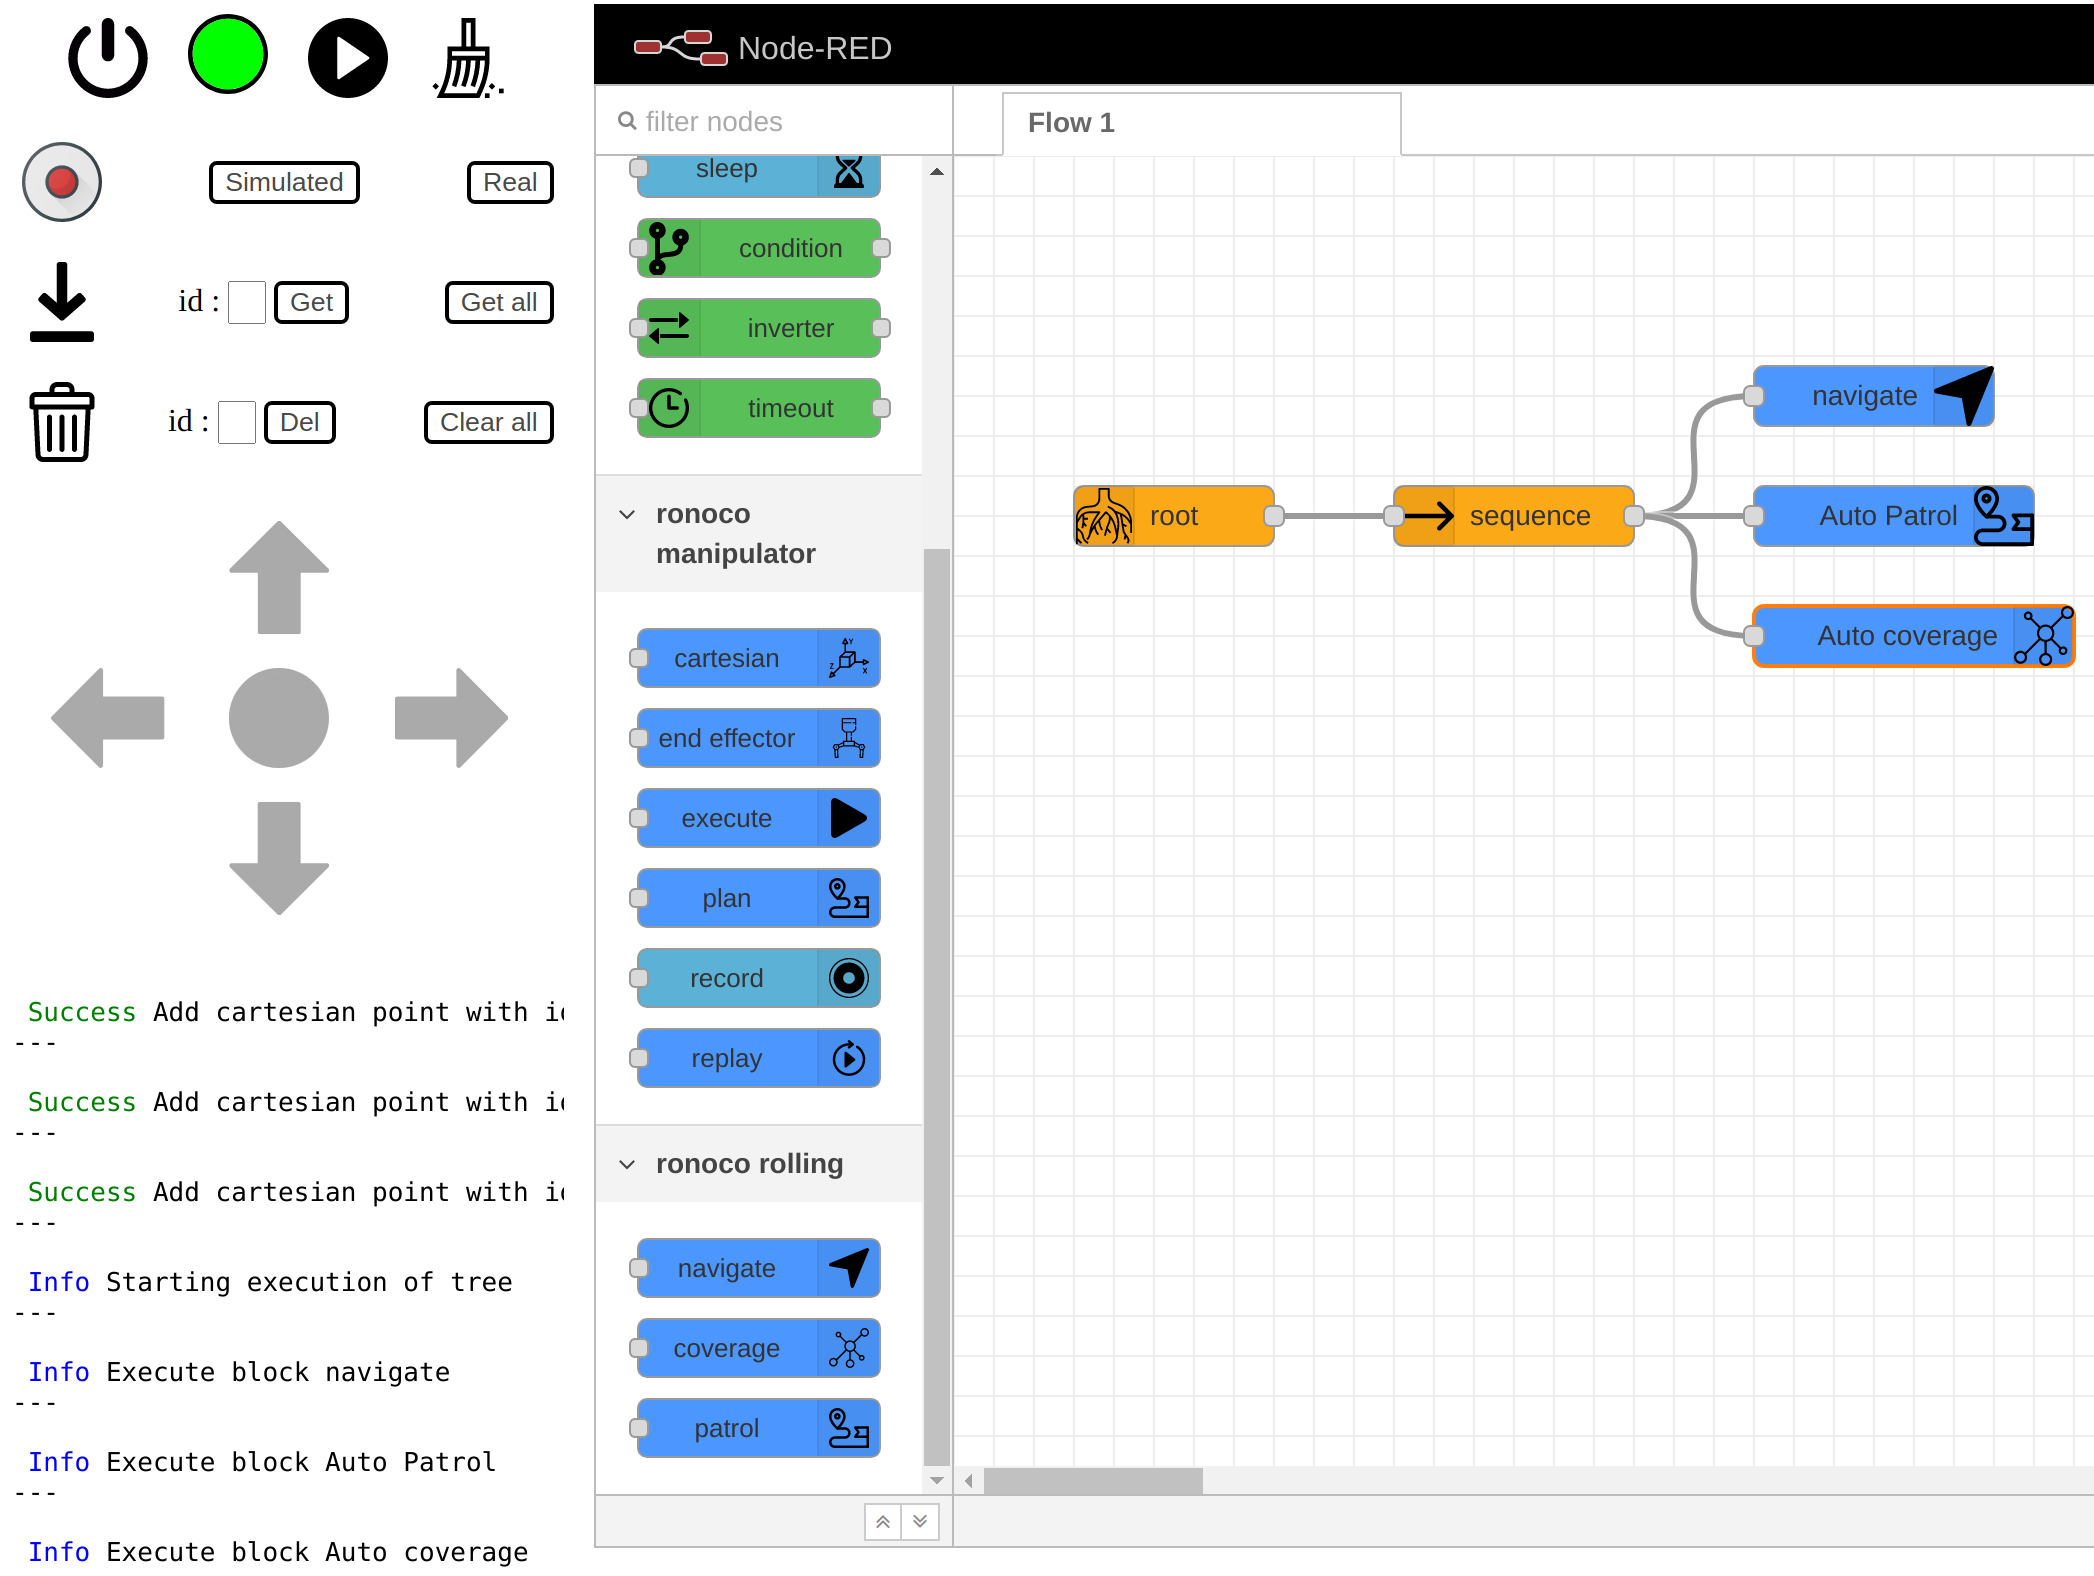
This tree will ask the robot to navigate to point 0, then to patrol between points 0, 1 and 2 and finally to scan the polygon formed by points 0, 1 and 2. Its execution gives the result below.