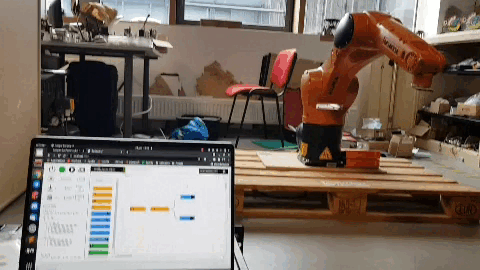
Example on Kuka KR6
This guide explains how to use the kuka KR6 at eirlab and ronoco on it.
Mise en garde
Please note that the Kuka KR6 R900 arm is not a cobot. It is necessary to take every precaution to avoid injury. When the arm is activated never enter its working area. Ideally, a second person should be assigned to the external emergency stop button when operating the arm.
To begin, turn the green on/off switch on the controller to the on position. The kuka will initialise for a few minutes.
Once initialized you will have access to the kuka control interface.
Manual control
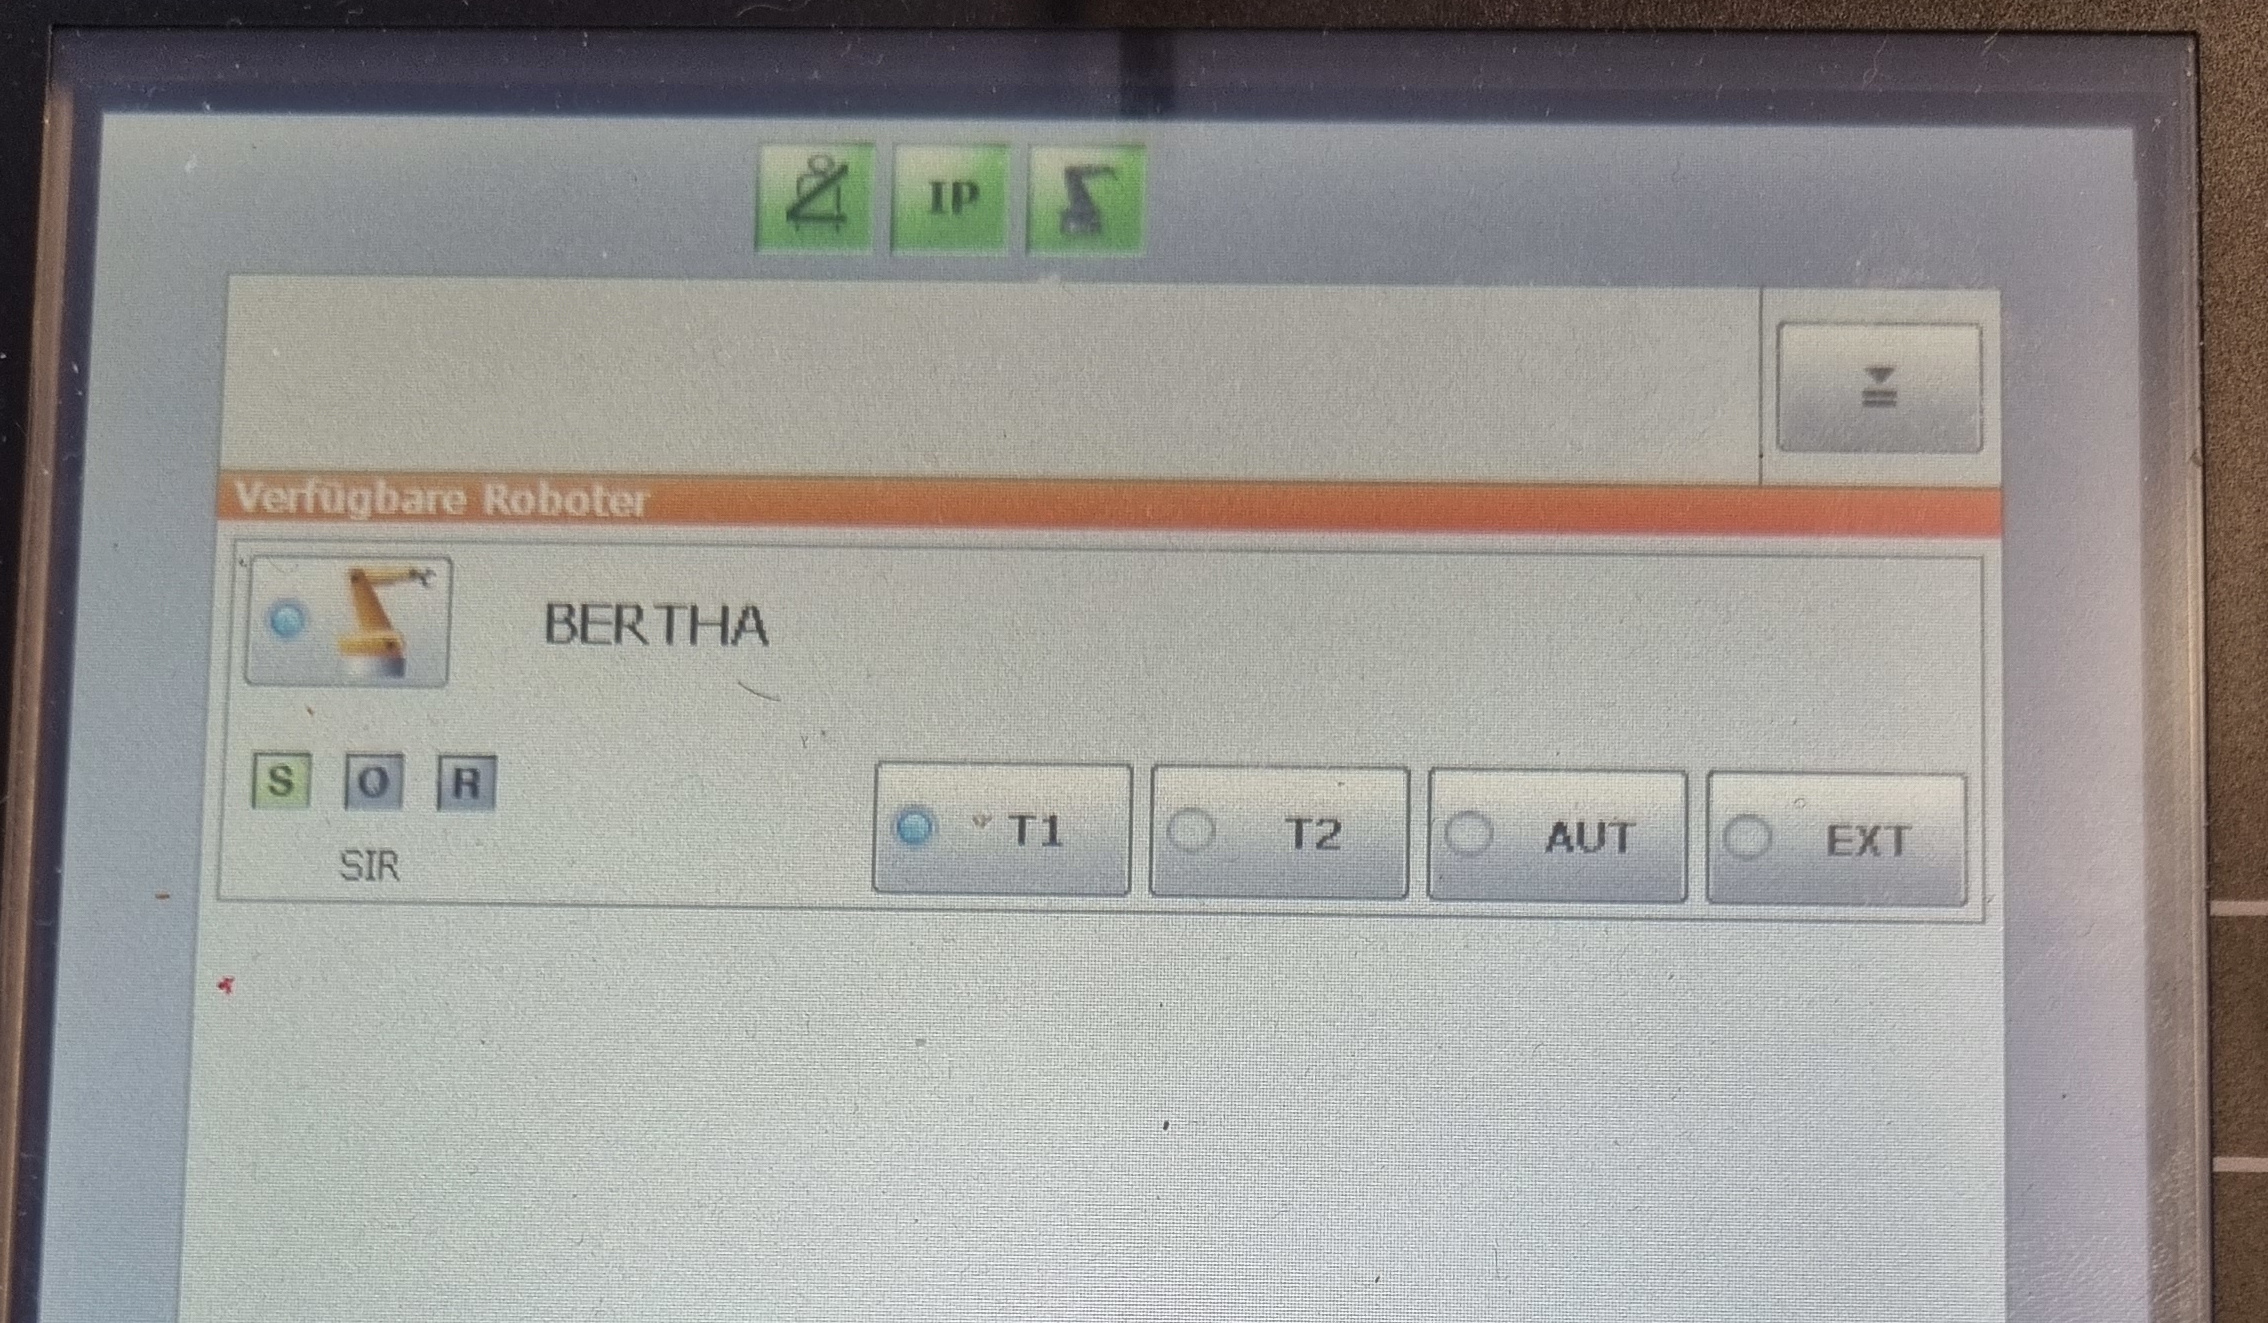
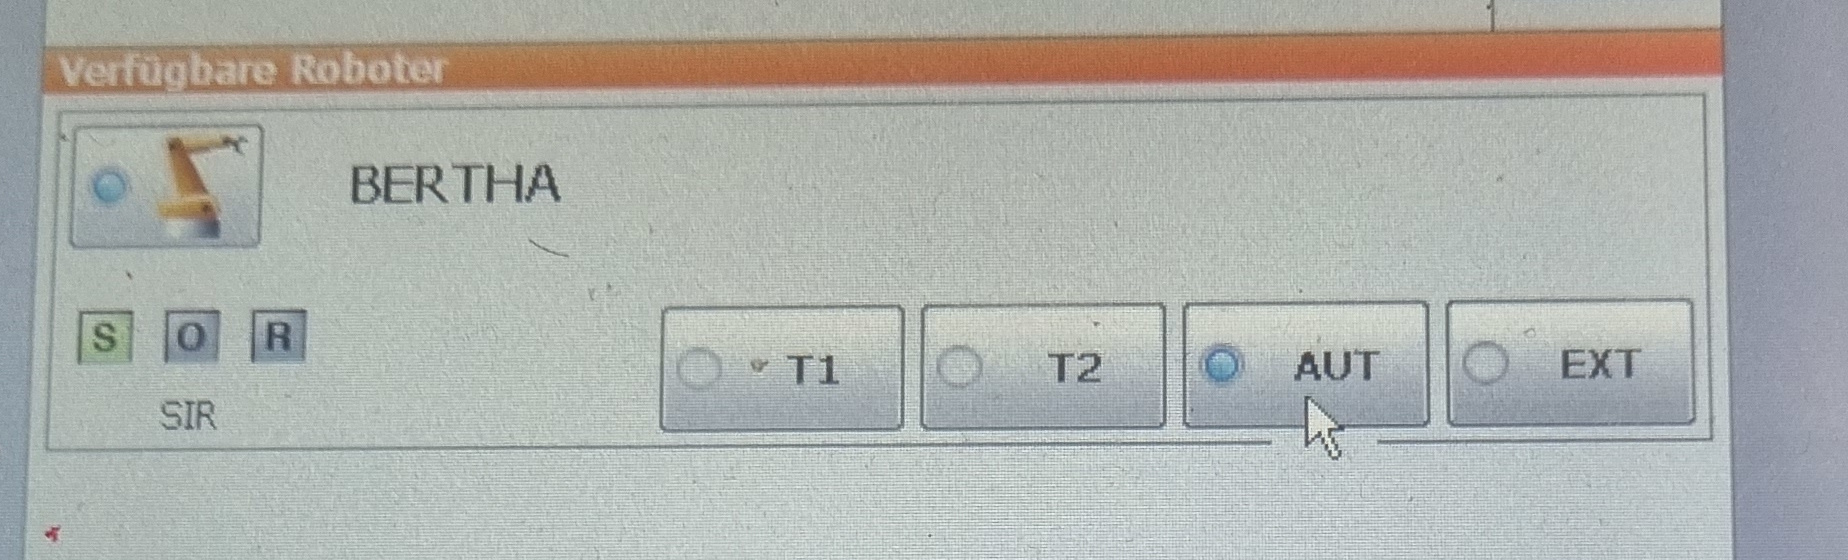
To control the robot in manual mode start by placing it in T1 mode. To do this, turn the key on the control panel, press T1 and then turn the key over.
Once in T1 mode, unlock the emergency stops. Click confirm all on the control panel
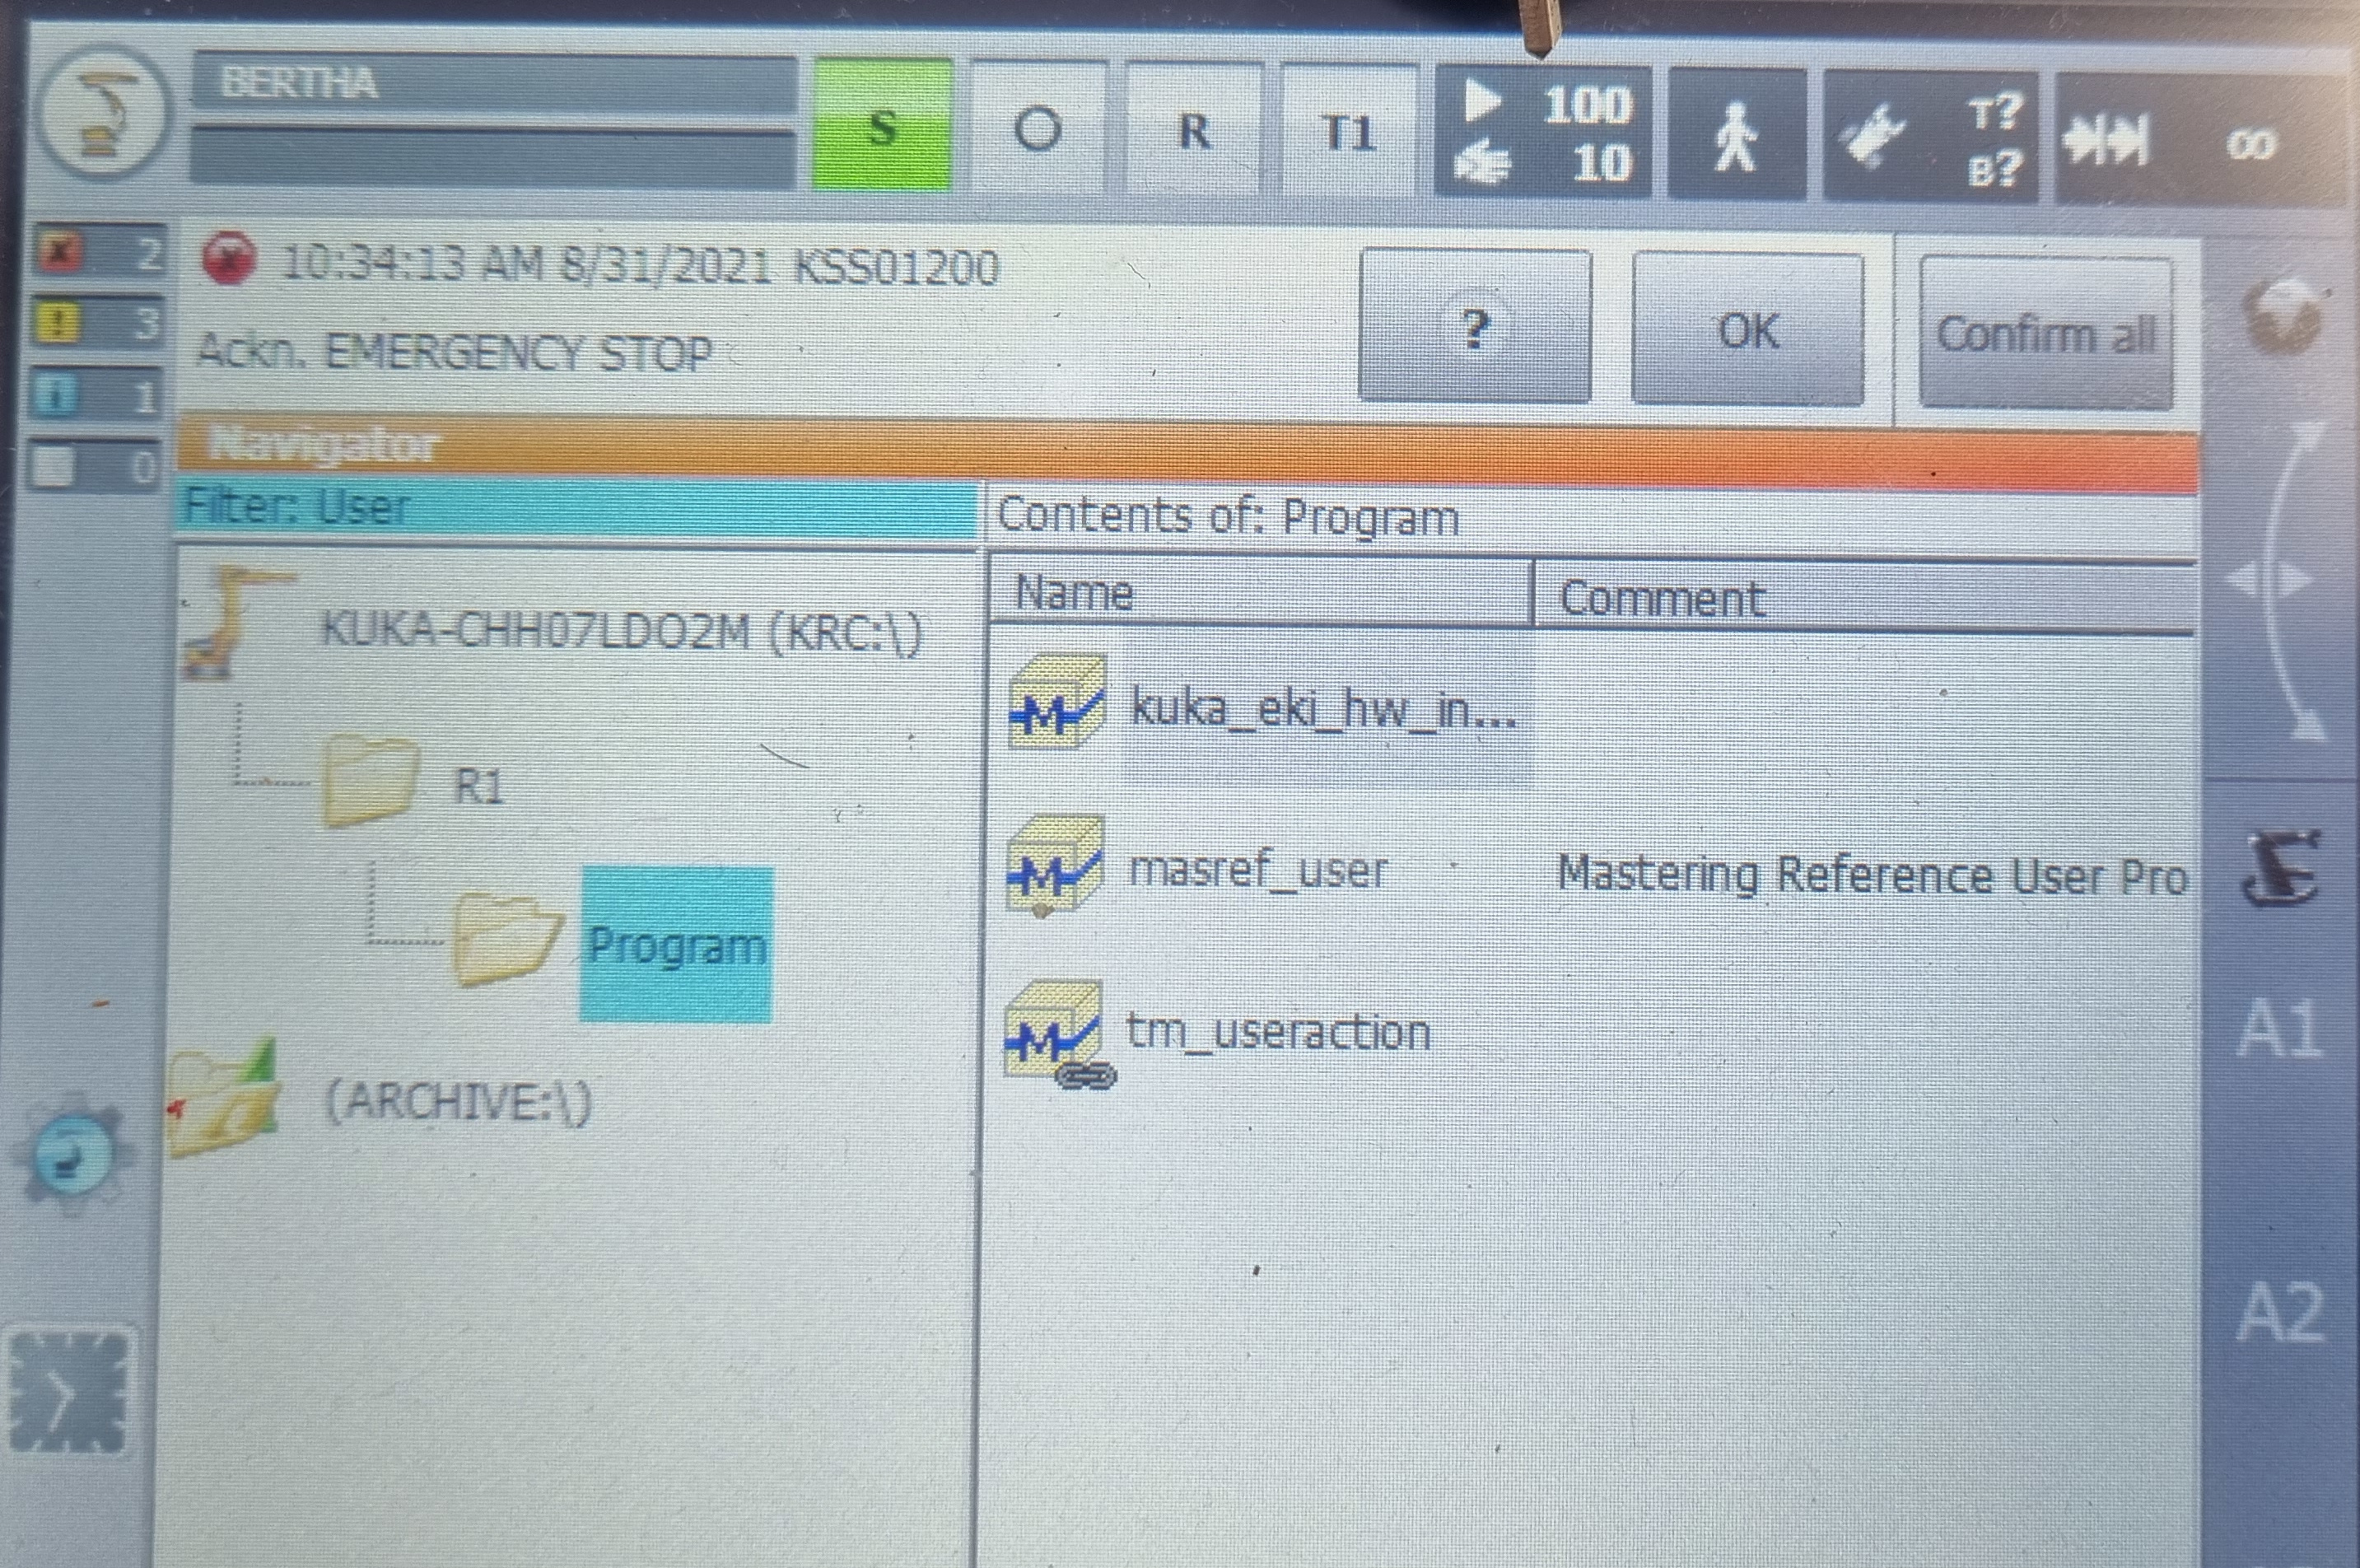
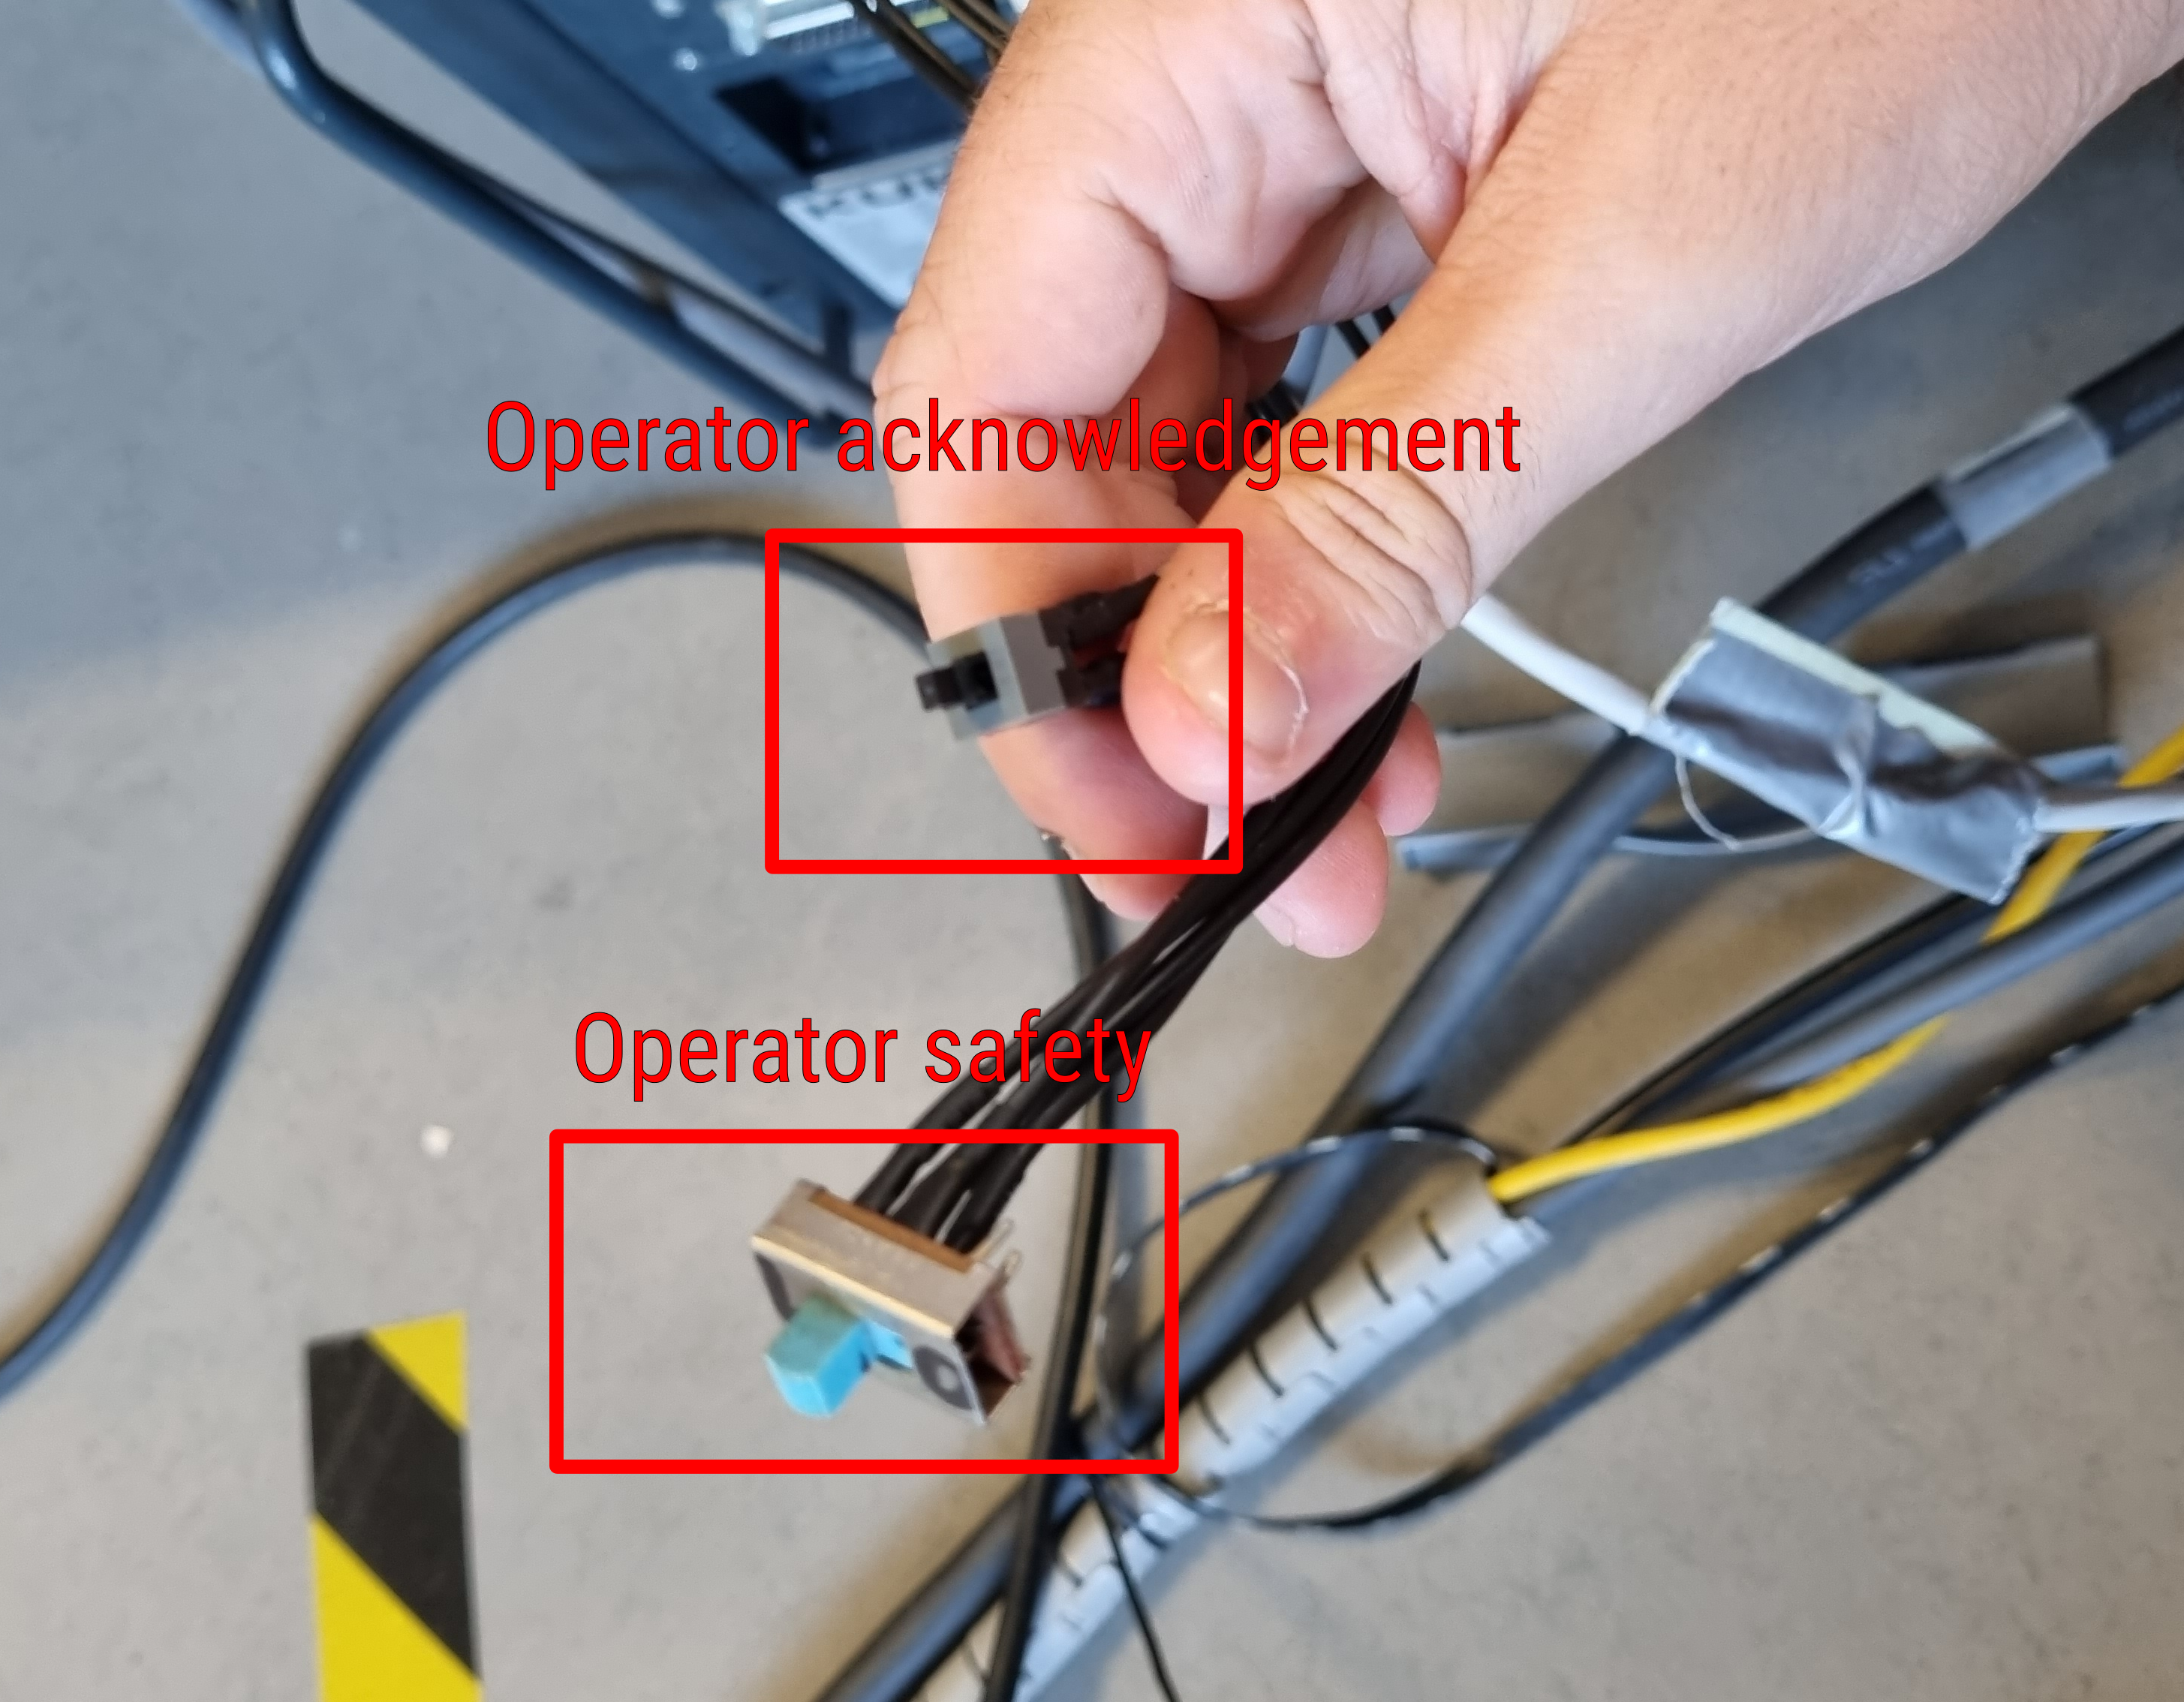
then click on the operator acknolegment button on the back of the controller (without going through the kuka work area!)
At this point the kuka is ready to be controlled manually. Simply hold one of the white buttons on the back of the tablet with your finger and then move the various joints with the 6 buttons on the side of the tablet.
Automatic control
To run a program on the kuka it is necessary to switch it to automatic mode.
⚠️ Automatic mode means that you do not need to hold down a button to make the kuka move as in T1 mode, when using this mode always have an emergency stop button in your hands. To switch to automatic mode turn the key, click aut and then turn the key back.
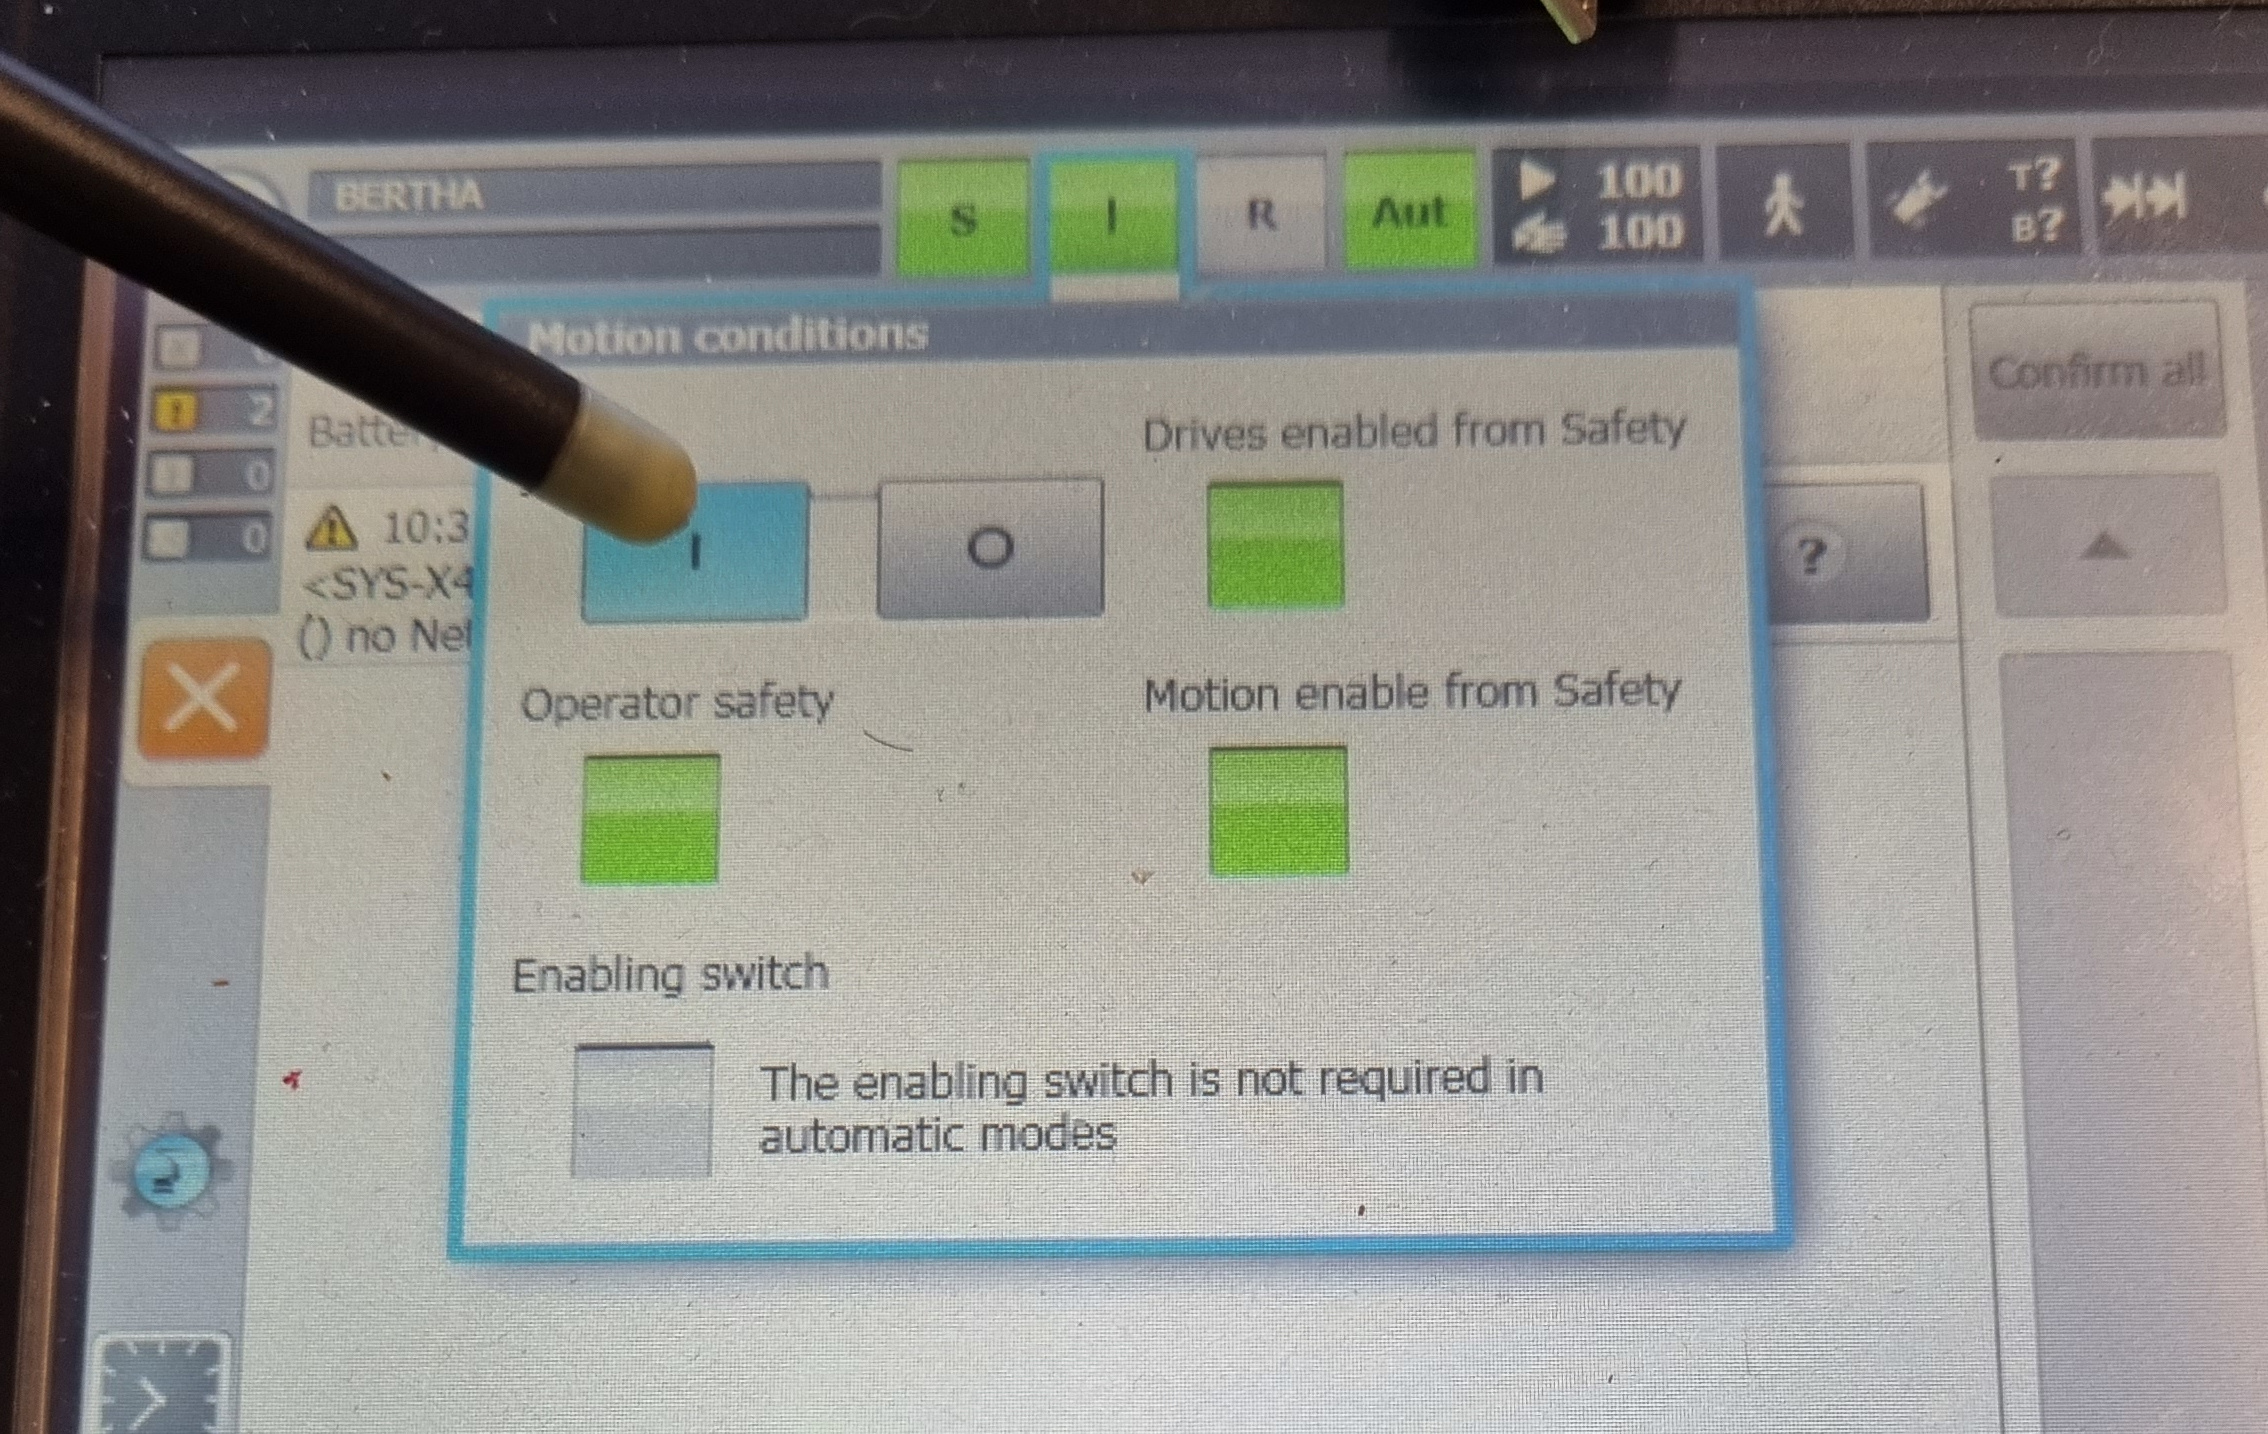
Once in automatic mode, unlock the emergency stops, set the operator safety switch to 1 and click on operator acknowledgement (without going through the kuka work area!). Then start the controller by clicking on the I (or O) at the top of the tablet and then clicking on the I button
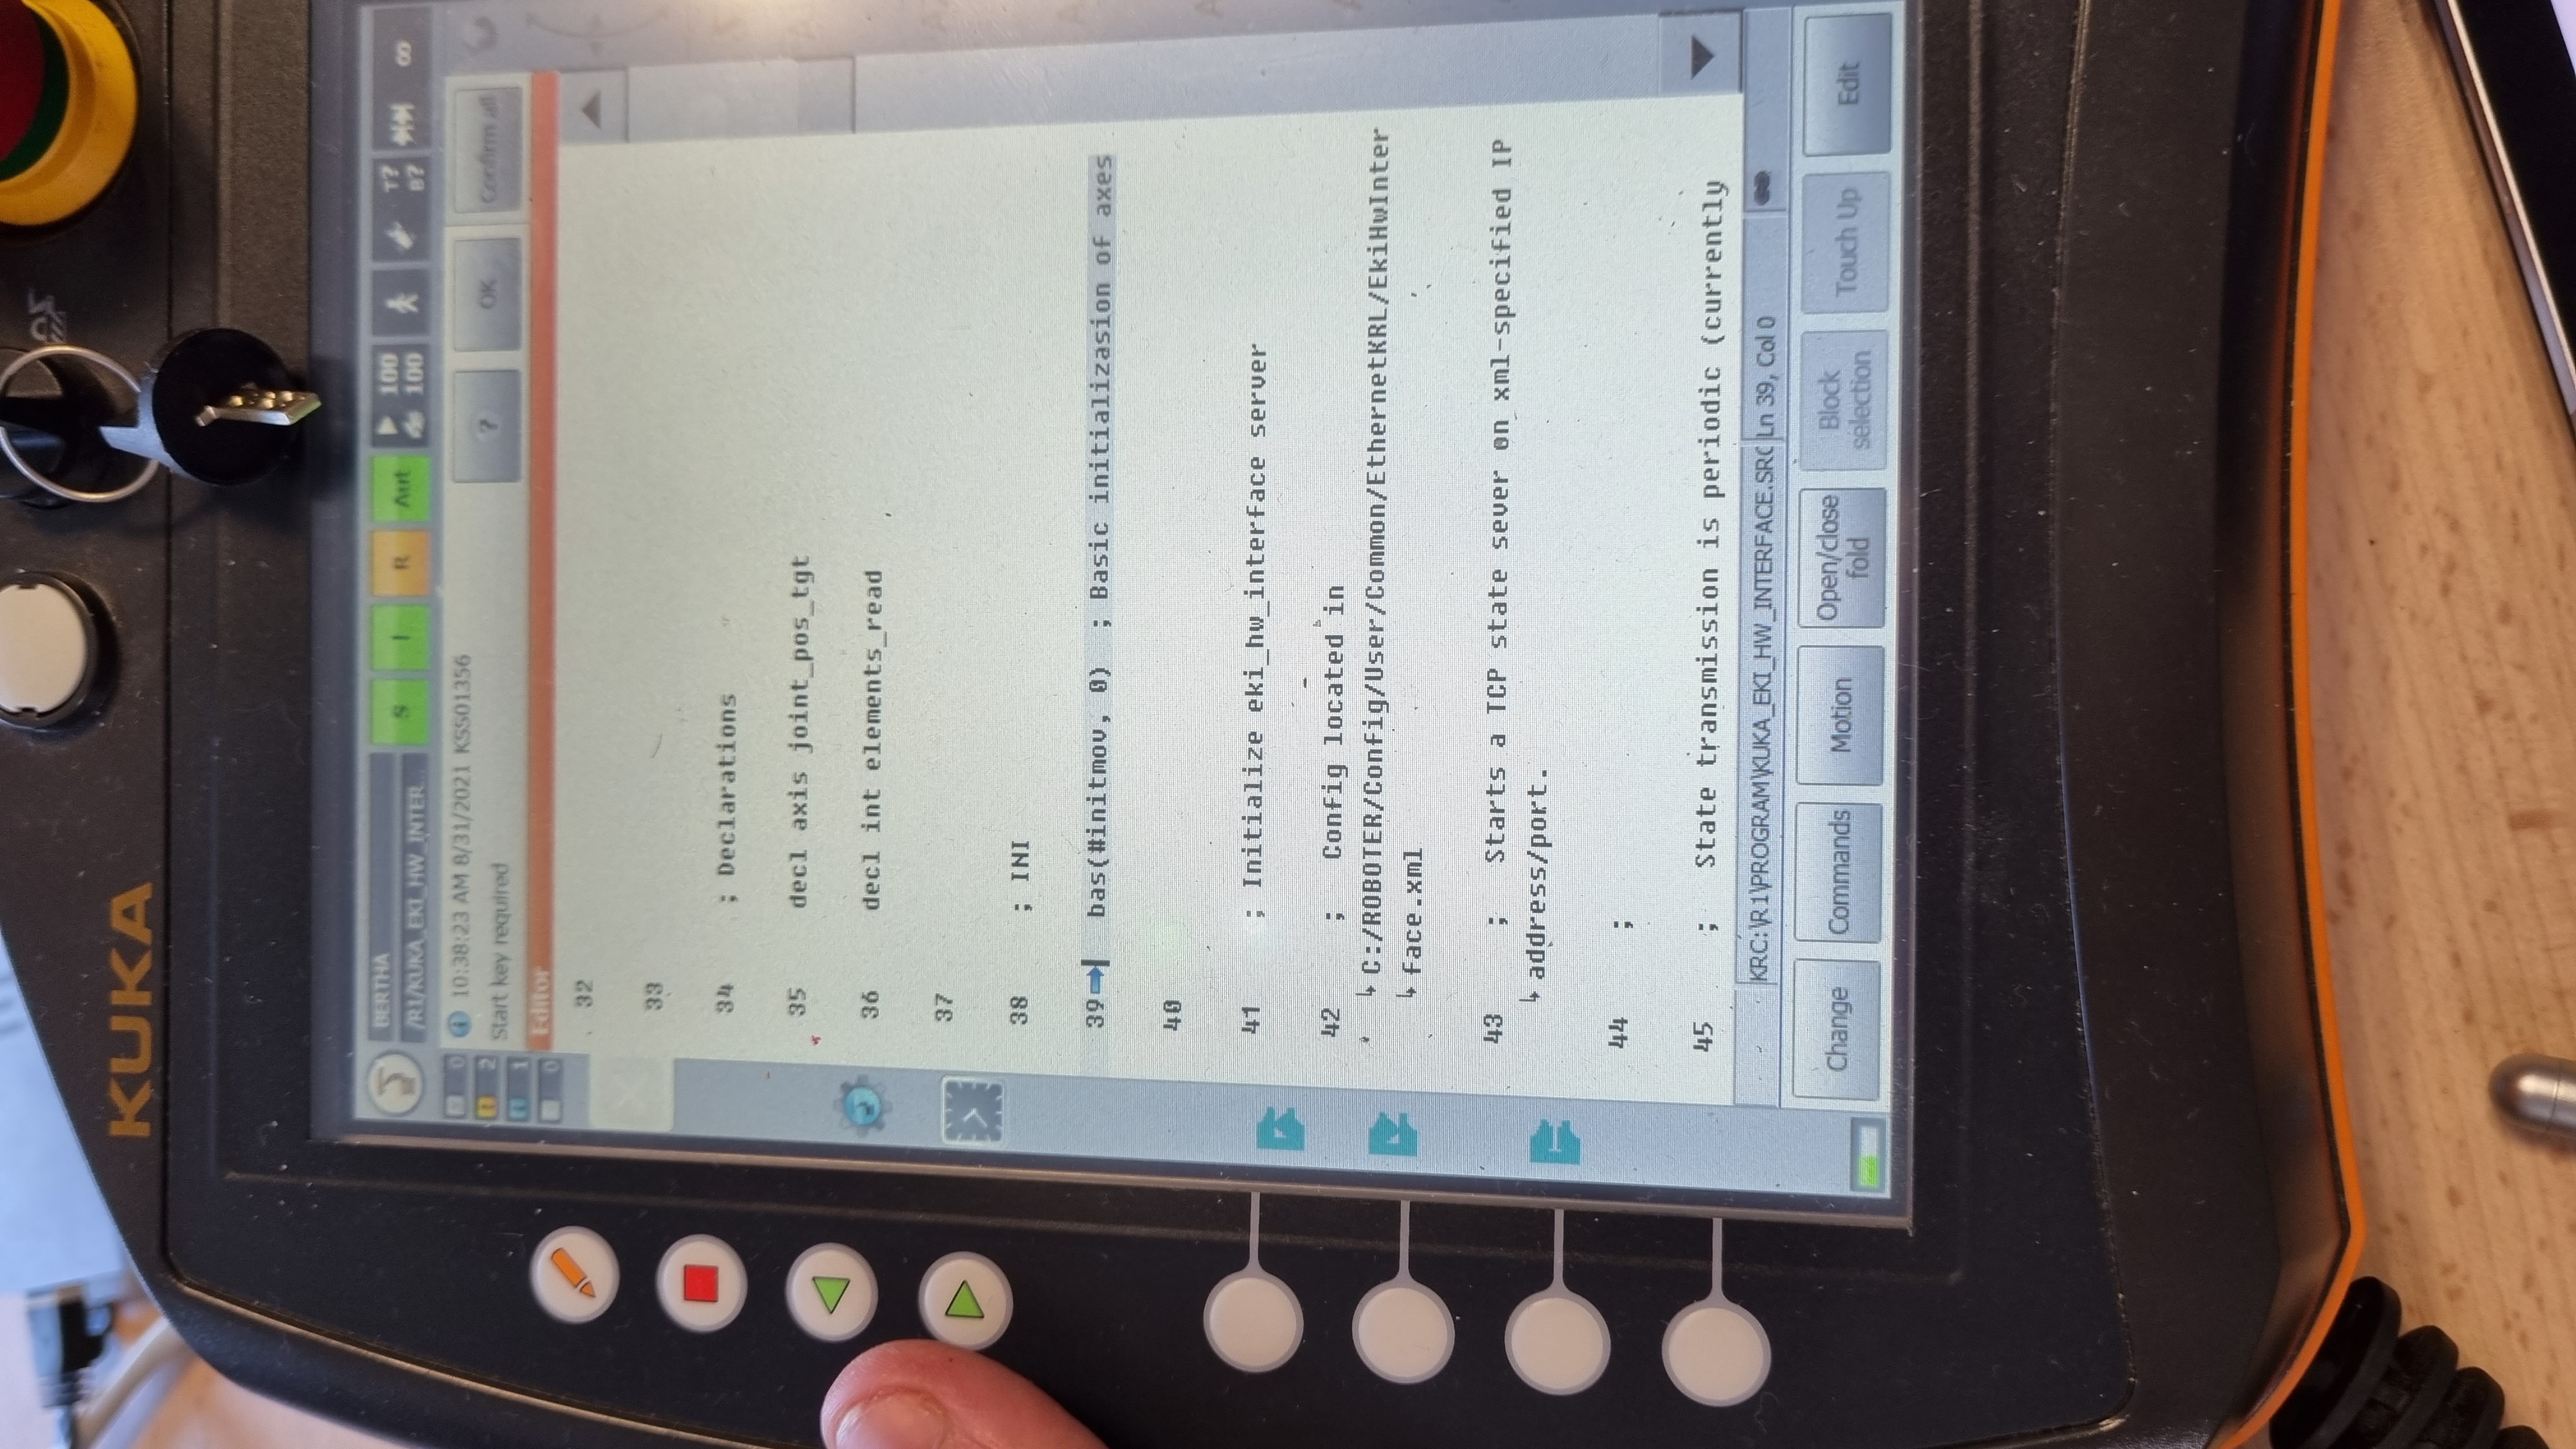
Then you have to select a program. For example, for the program kuka_eki you just have to click on it and then press the select button. Finally, to start the program, press the play button on the left of the tablet.
⚠️ The programme is now running independently. Please be aware of the kuka's movements and do not hesitate to press the emergency stop.
ROS
Installation
sudo apt-get install python-imaging-tk
sudo apt-get install python-tk
cd ~/catkin_ws/src/
git clone https://github.com/ros-industrial/kuka_experimental
git clone https://github.com/Bordeaux-INP/dimr-kuka
cd ..
rosdep install --from-paths src --ignore-src
catkin_make
source ~/.bashrc
If you also want to use the wsg50 effector mounted on the kuka :
cd ~/catkin_ws/src/
git clone https://github.com/nalt/wsg50-ros-pkg
cd ..
catkin_make
source ~/.bashrc
Simulation
To start the DIMR-KUKA project in simulation, type the following command. An RSI simulator is started in the background to simulate the true response of the KRC4 via the RSI module.
roslaunch dimr_kuka dimr_kuka.launch sim:=true gripper:=false
Real
Once the kuka has been put into emergency mode, connect the ethernet cable from the switch on the bottom of the kuka to your PC. Also connect the power supply to the end effector if you wish to use it. Once everything is connected you can remove the emergency stop on the kuka and run the kuka_eki program.
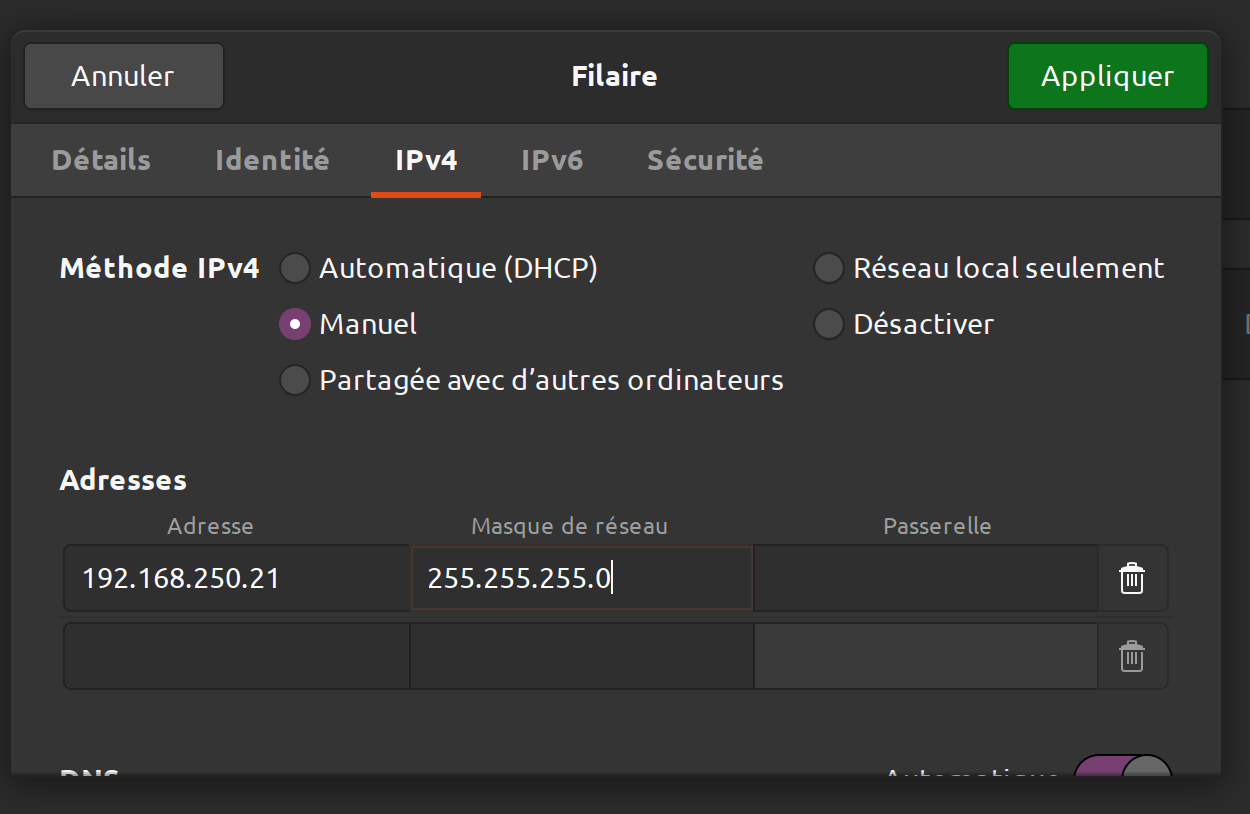
On your pc it is necessary to manually provide DHCP on the address 192.168.250.21/24. Remember to disable the proxy server if you have one. The kuka ip address will be 192.168.250.20 and the effector will be 192.168.250.22.
You can check the connection of all items by running the command nmap -sP 192.168.250.0/24 if everything is connected the output should be similar to this:
Starting Nmap 7.80 ( https://nmap.org ) at 2021-08-31 10:57 CEST
Nmap scan report for 192.168.250.20
Host is up (0.0016s latency).
Nmap scan report for morhost-iscsi2.iscsi.ipb.fr (192.168.250.21)
Host is up (0.00027s latency).
Nmap scan report for hangar-iscsi2a.iscsi.ipb.fr (192.168.250.22)
Host is up (0.0025s latency).
Nmap done: 256 IP addresses (3 hosts up) scanned in 16.12 seconds
You can then run the command for the kuka. You will then have access to rviz to control it.
roslaunch dimr_kuka dimr_kuka.launch sim:=false mode:=eki gripper:=false
🦾 To use the effector, it is first necessary to change the connection ip in the ros package. Open with your favorite editor the file: ~/catkin_ws/src/wsg50-ros-pkg/wsg_50_driver/launch/wsg_50_tcp.launch and replace line 5 with the line below
<param name="ip" type="string" value="192.168.250.22"/>
Once registered you can run the following command to take control of the effector.
roslaunch dimr_kuka dimr_kuka.launch sim:=false mode:=eki gripper:=true
🔧 The gripper services then start automatically, you can test the operation of the gripper with the command rosservice call /wsg_50_driver/move 50 50. If it moves everything is normal. If it responds with a 255 error then go to the 192.168.250.22 tab manual control and click on the home button you can then use the effector directly with ROS.
Ronoco
To use the kuka (and the effector) with ronoco you just have to install the project and then launch it with the following command.
roslaunch ronoco manipulator.launch commander:=manipulator compliant_mode:=None end_effector:=wsg_50_driver/move