How to use it
This page explains how to use the application to control a robot. It is divided in 3 parts, the first one explains how to use the different buttons of the control interface. The second part explains how to create behaviour trees and the specificities of the different blocks.
Control Interface
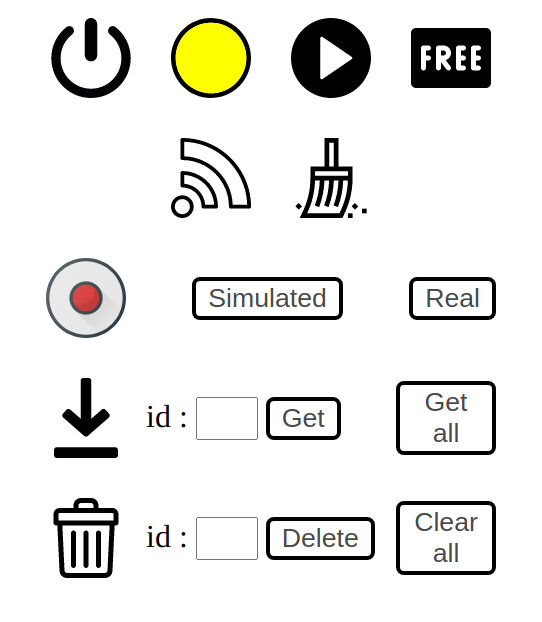
Control Interface
 Allows to stop the server (WIP: allows to start and stop the whole application)
 Represents the status of the server, when it is empty it means that the client has not yet received any information from the server. It is probably still loading.
 When it is black (here white) it means that at least one request to the server has not been answered and therefore the server is not running or is in error
 When it is red, it means that it is not possible to reach the commander. Check that MoveIt is running and that the order passed as a parameter is the right one, then click on the connect button
 When it is orange it means that ROS is not working as expected. The source of the problem is either the absence of roscore (the rosout/get_loggers service is not available) or the absence of moveit (the move_group/get_loggers service is not available). In this state ronoco is not usable
 When it is yellow it means that Rviz is not communicating the position of the interactive marker. If rviz seems to be working correctly on your machine, simply move the interactive marker to fix the problem. In this state ronoco is usable but the "simulated" button will produce an error
 When it is green it means that ronoco is fully usable
 This button asks the server to execute the last behaviour tree deployed from Node-RED
 Enables the robot to be set to compliant mode. This button can only be used for a robot that has a service to set it to compliant mode
 Allows to connect to the commander passed in parameter when the status of ronoco is red
![]() Clear logs in ronoco-ui
Clear logs in ronoco-ui
 This group of buttons allows you to record points in the environment. There are two recording modes either via the simulated button which records the position of the interactive marker. Or via the real button which records the actual position of the robot.
 This group of buttons allows you to view the different registered positions. It is possible to consult a specific position by filling in the id field and then pressing get or to consult all the registered positions by using the get all button.
 This group of buttons allows you to delete the different registered positions. It is possible to delete a specific position by filling in the id field and then pressing delete or delete all registered positions by using the clear all button
Area for creating behaviour trees
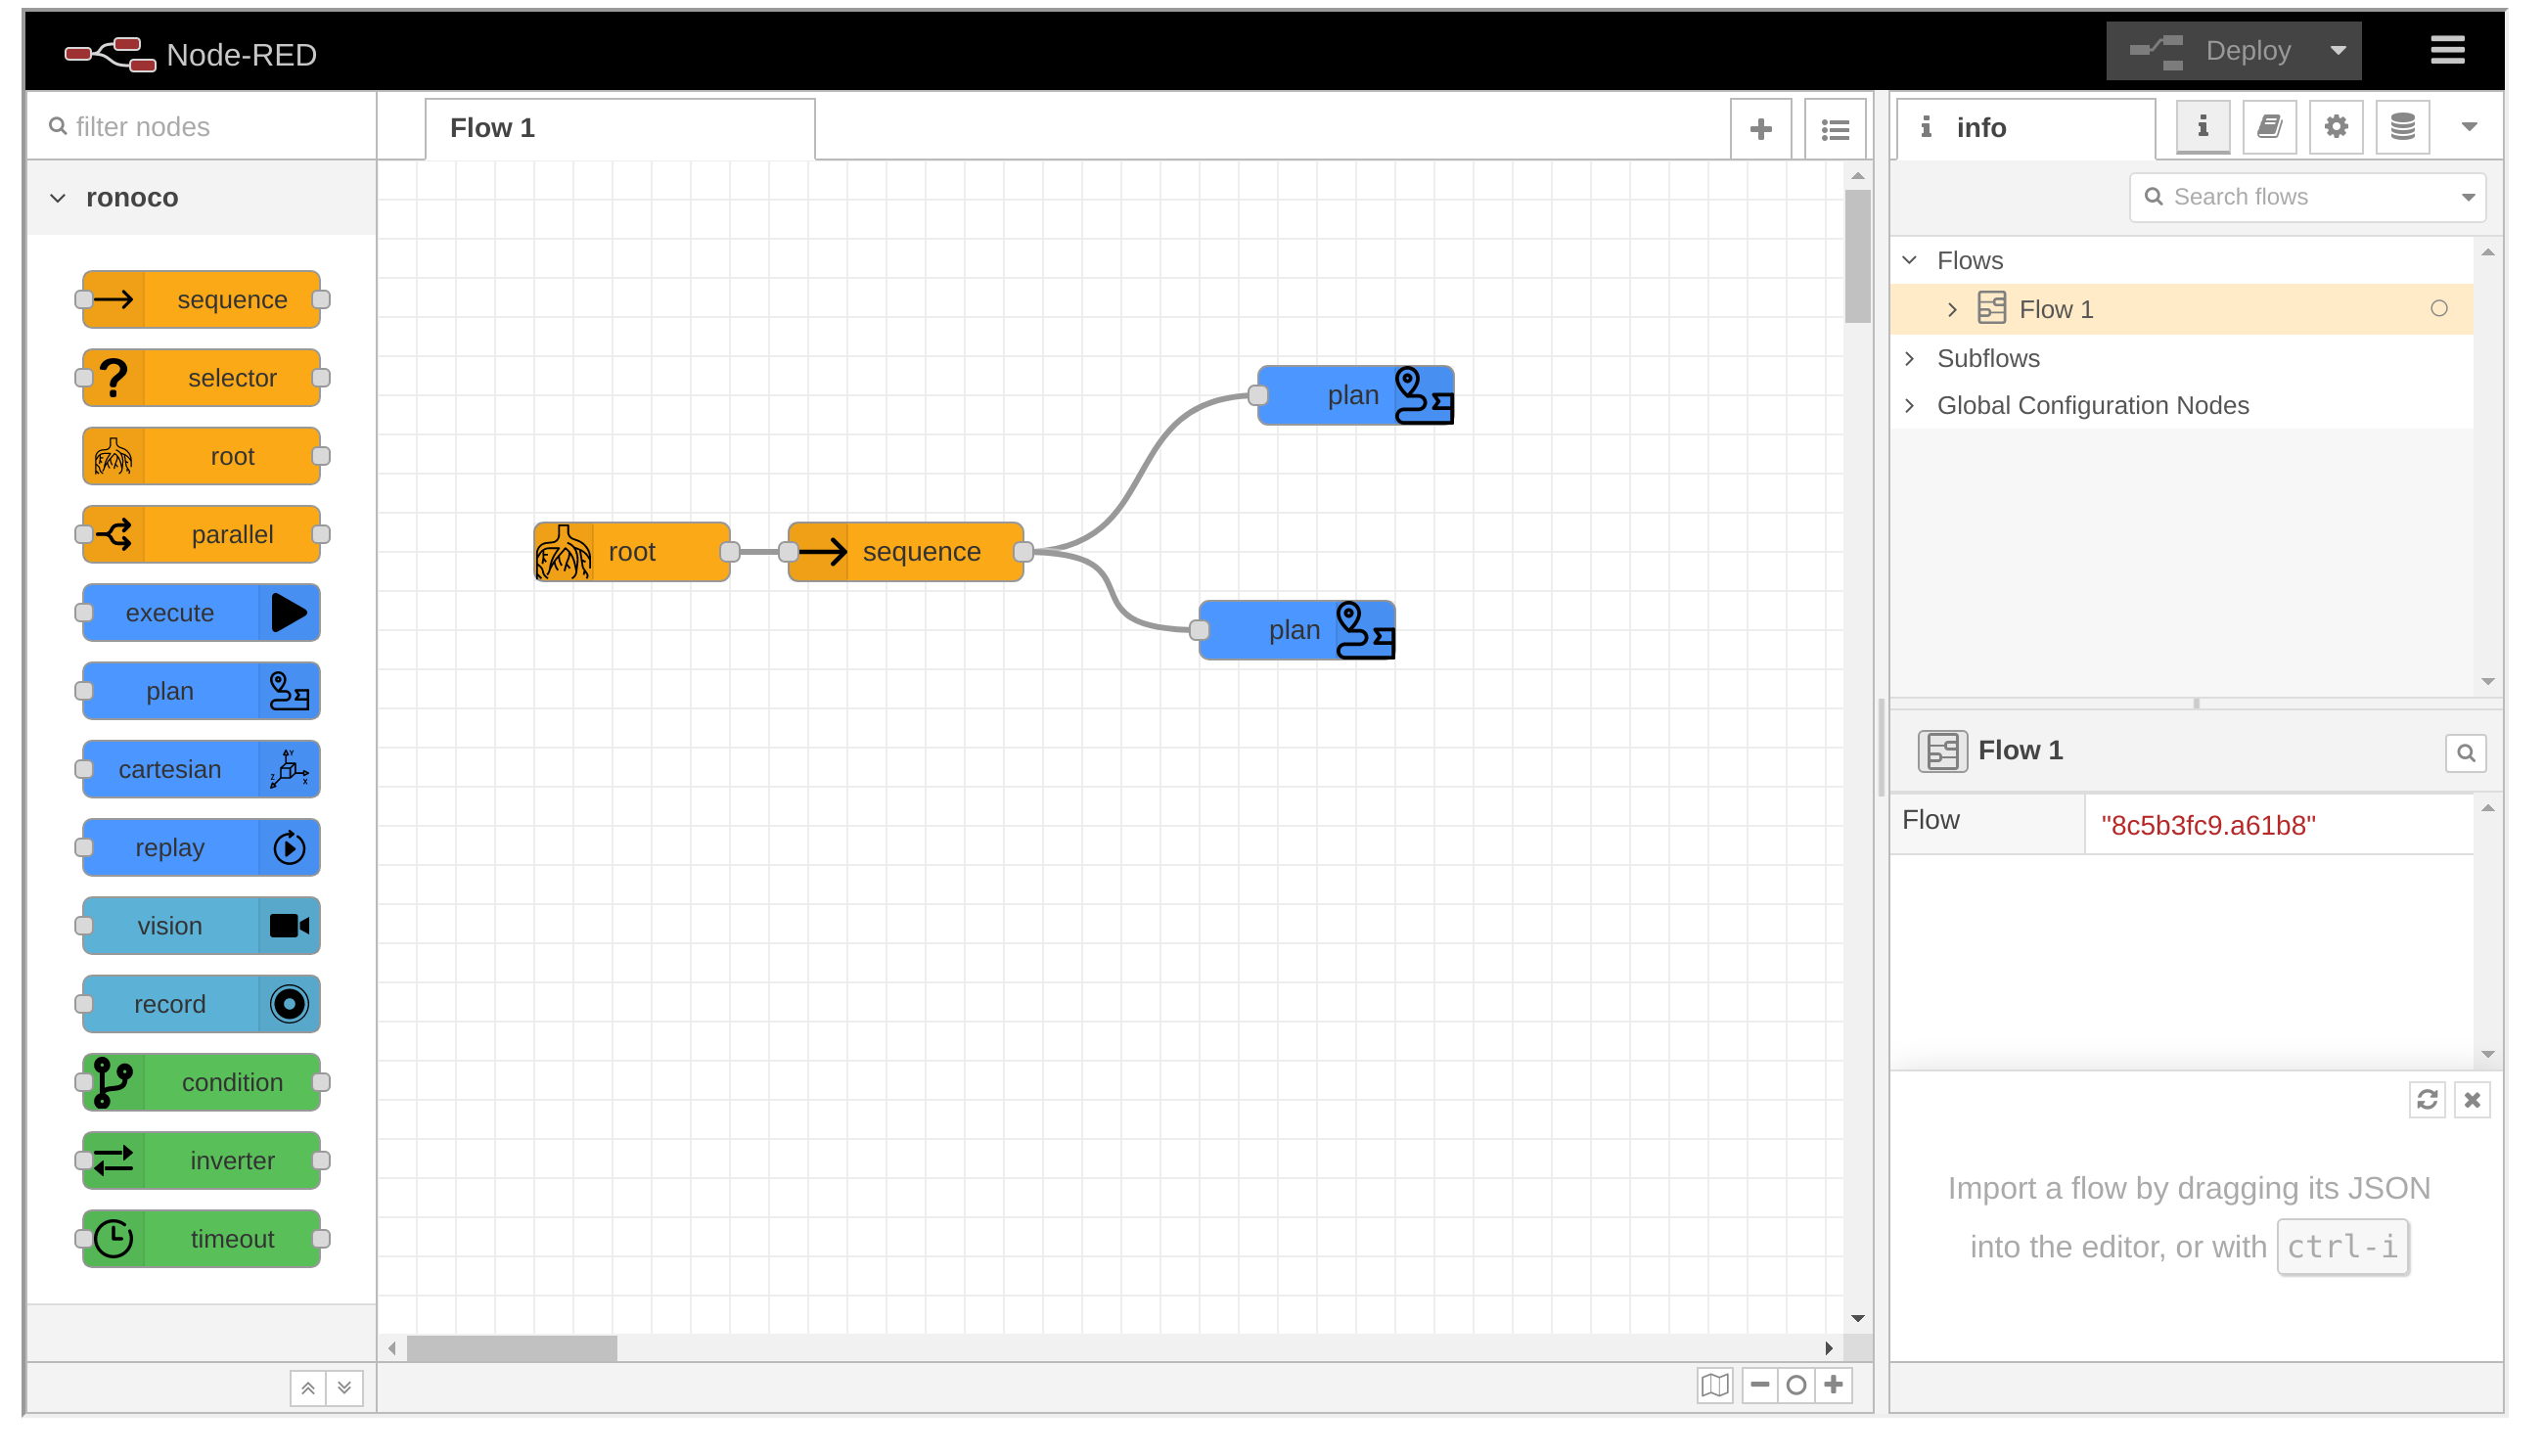
Area for creating behaviour trees
The behaviour tree creation area is an instance of Node-RED it is necessary to have the Ronoco specific Node-RED palette installed to use the application. Refer to the installation page
⚠️ Ronoco is not compatible with the native Node-RED blocks, only the blocks of the ronoco-nodered palette are usable. You can make the native blocks disappear by clicking on the three horizontal bars at the top right, then Manage Palette and finally click on disable all for the node-red palette.
This section explains how to create a tree interpretable by ronoco-vm and run it. To learn how to create behaviour trees, refer to the associated page. For the documentation of each block, you can access it directly from ronoco or from the behaviours documentation.
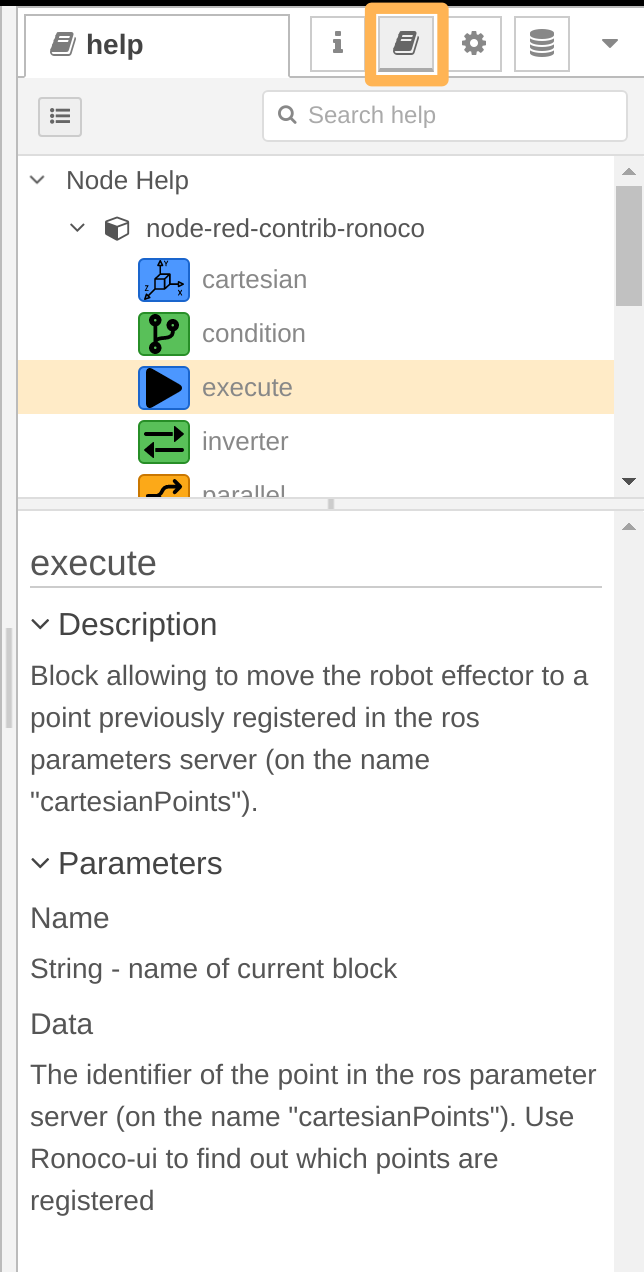
Access to block documentation from Ronoco
 To create Ronoco interpretable trees any tree must start with a root block and must contain at least one leaf (blue coloured blocks), a tree not starting with a root block will simply be ignored.
The root and decorators blocks (green blocks) must be followed by a single child.
The sequence, selector and parallel blocks accept multiple children.
All blocks (except the root block) can be the child of multiple blocks.
The behaviour trees are read from left to right and from top to bottom. If two child blocks of the same block are placed at the same height, an error will be raised.
A worksheet can contain multiple trees identified by their root block. If this is the case, the trees will be executed according to the height of their root block on the sheet (from top to bottom)
To execute a behaviour tree with ronoco it is necessary to click on the deploy button at the top right of the window and then on the play button of the control interface.